An inside look at the 3D pipeline that turns basic blueprints into photorealistic reality
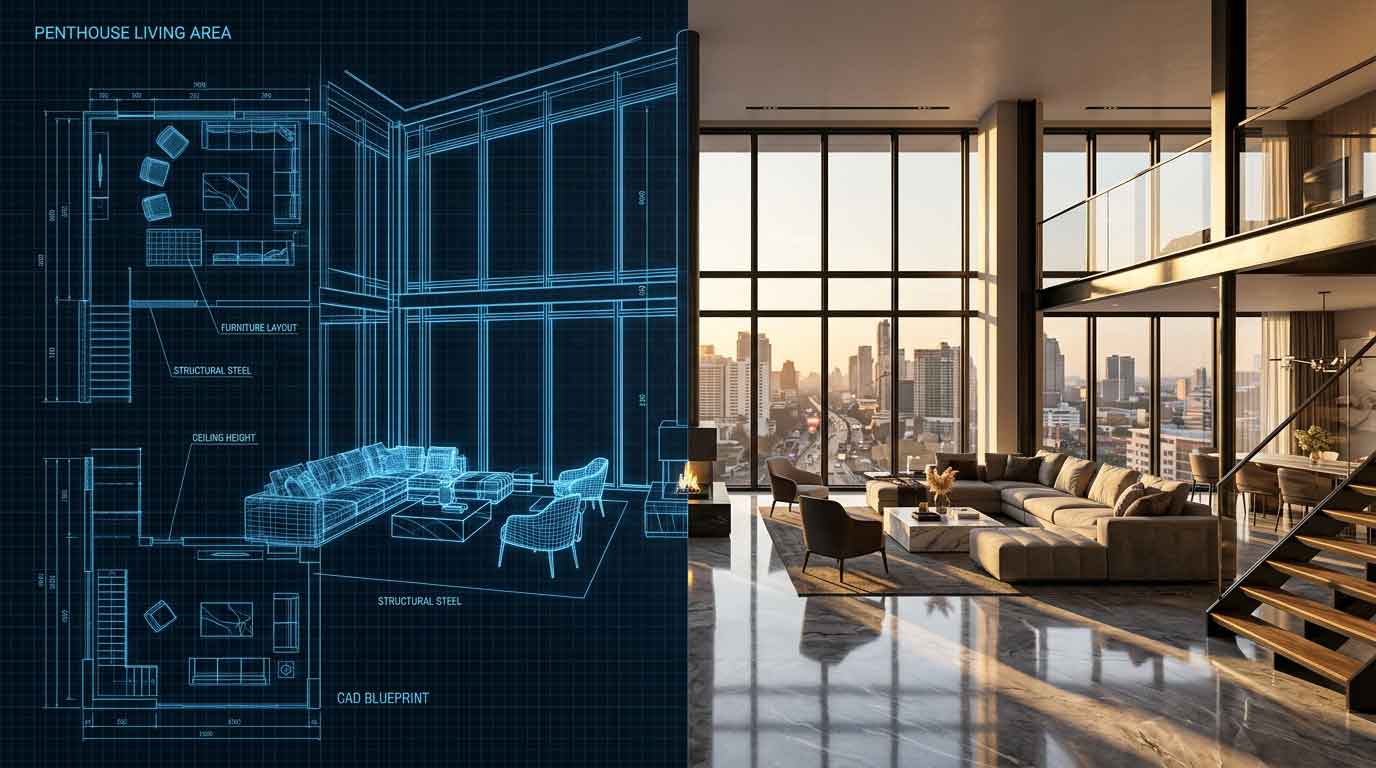
In the competitive world of luxury real estate and global architecture, a simple 2D floor plan no longer cuts it. Investors in Dubai, developers in New York, and architectural firms in Europe demand to feel a space before a single brick is laid. This is where high-fidelity interior and exterior architectural rendering bridges the gap between imagination and reality.
As a Senior Multimedia Designer with over 8 years of experience in the digital content space, I’ve refined a specialized pipeline to transform basic blueprints into photorealistic masterpieces. Here is a behind-the-scenes look at my ultimate architectural 3D rendering workflow.
Phase 1: Understanding the Vision and Blueprinting
Every successful 3D visualization starts with absolute clarity. Before opening any software, the first step is analyzing CAD drawings, mood boards, and the specific lighting intent of the space. Whether it’s a sun-drenched penthouse in Miami or a modern corporate facade, establishing the exact mood, material references, and spatial dimensions is non-negotiable.
Phase 2: Precision 3D Modeling
Once the concept is locked, the structural foundation is built. Using industry-standard tools like Blender, I construct the geometry of the space. This phase is all about mathematical precision—ensuring that the scale, proportions, and architectural details are flawlessly translated into the digital realm. A 3D Visualization Expert knows that even the slightest inaccuracy in scale can break the illusion of realism.
Phase 3: High-End Texturing and Cinematic Lighting
This is where the magic happens. A model is just a gray box until it is accurately textured and lit.
-
Texturing: I utilize physically based rendering (PBR) materials to ensure that marble reflects light accurately, fabrics have realistic micro-textures, and glass refracts naturally.
-
Lighting: Global illumination, ray tracing, and precise HDRI setups are used to simulate real-world sunlight and artificial interior lighting.
Handling massive architectural environments without compromising on photorealism requires serious computational power. My workflow is backed by a robust hardware architecture—featuring an Intel Core i9-14900K, an RTX 4080 GPU, and 128GB of RAM. This setup allows for seamless handling of complex node trees and real-time lighting adjustments without bottlenecks.
Phase 4: Architectural 3D Walkthrough Animation (Unreal Engine Integration)
Static images are great, but motion sells the dream. For high-ticket projects, transferring the optimized assets into Unreal Engine allows for the creation of cinematic architectural 3D walkthrough animations. This provides clients with a dynamic, immersive experience, complete with smooth camera sweeps, depth of field, and ambient environmental effects. It transforms a standard presentation into a premium visual narrative.
Phase 5: Post-Production and Color Grading
The final render is never the finished product. In post-production, raw renders are imported into professional compositing software. Here, contrast is tweaked, atmospheric elements like subtle fog or bloom are added, and color grading is applied to give the visuals that signature cinematic polish.
Bring Your Next Project to Life
In today’s digital landscape, your visual presentation is your strongest sales tool. Whether you are an international property developer or a leading design firm, having premium CGI content is the key to standing out.
If you are looking to elevate your next project, it’s time to collaborate with a dedicated professional. Contact Sumit Dhiman to hire a Senior Multimedia Designer and let’s turn your architectural concepts into stunning visual realities.